We use affiliate links and may receive a small commission on purchases.
It does not have to be essential to have ultra powerful and expensive equipment to be able to make video editing in very high resolution, even with a high frame-rate. Even us at the moment for our YouTube channel The Windy Burrow, we’re using on an old PC from 2012. Editors of NLE have understood it and all of them offer the use of proxies to be able to work without worrying about the computing power normally required to process demanding files.
Proxies? Optimized files? What is it about ?
Optimized files are lighter versions of the source video files (those recorded by the camera) used during editing, in order to work more easily by avoiding problems of slowness or jerky video playback on the timeline. The quality of these files is lower, but they are only used on the timeline in your project, in the end the export is done from the original source files.
This is a kind of transcoding or what other programs like AVID or Premiere Pro call proxy files.
DaVinci Resolve allows the use of proxies, this feature is called Optimized Media and here’s how to use it.
Prepare your project to use Optimized Media
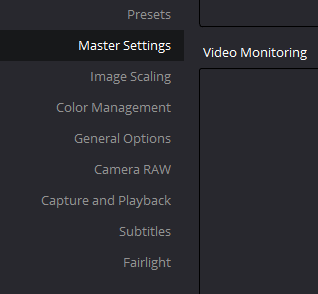
Go to the configuration of your project under Project Settings, then Master Settings:
Then go down to the Working Folders section. The Cache files location part is where the optimized files will reside, so they should be placed on a fast read and write disk, preferably a SSD.

Next, let’s take a look at the Optimized Media and Render Cache section just above. The 2 fields that interest us are Optimized Media Resolution and Optimized Media Format.
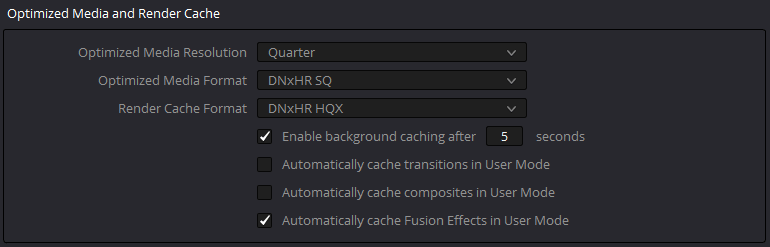
The first one, Optimized Media Resolution, denotes the resolution in which the proxy files will be saved, for example if the original clips are in Ultra HD (3840 x 2160), maybe you want to work with proxy files half the size of those original clips, that is to say in 1920 x 1080 (1080p). You will then have to choose Half.
Regarding the Optimized Media Format field, as its name suggests, this is the format used by proxy files. Here everything depends on the starting scenario and the goal, in my case, I have an old machine, not very powerful, so I will use an “easy” format like the DNxHR SQ or DNxHR LB. This is a very light post-production codec for PC and Mac that takes up little space on the hard drive, the quality suffers but to edit on a low-power machine or on a laptop, it is quite ideal. Anyway, again this does not change the final quality of the export which will use the original files. Those working on Macs may prefer the ProRes Proxie.
If on the other hand you have the power and the goal is to calibrate a final edit, then it would be better to use files in a higher quality format like DNxHR HQX (or ProRES HQ on Mac).
At this stage, the configuration is done.
Use proxy files in the project
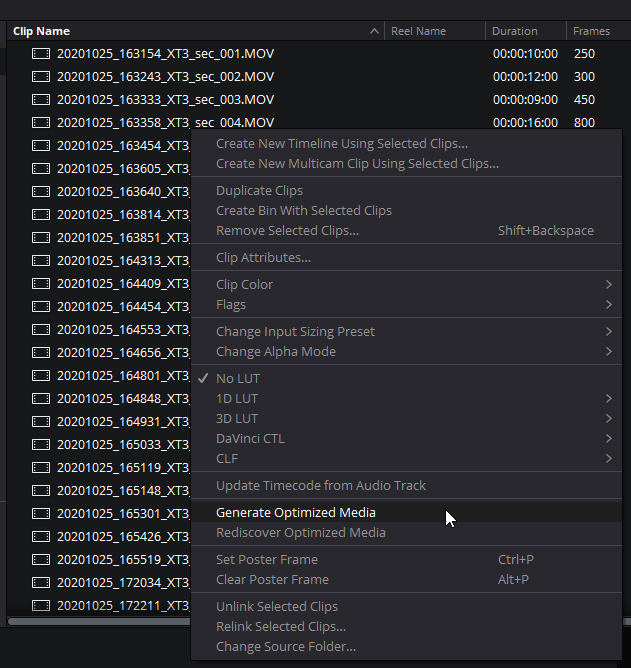
We’re going to edit, it’s time to use our proxy files. In the Media Pool, we will simply right-click on the clip(s) that we want to use in their optimized versions and choose Generate Optimized Media.
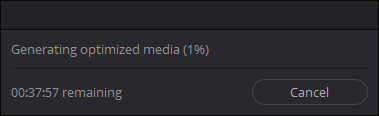
A window will then open with a progress bar and depending on the power of your editing station, you will need more or less patience.
When this is finished – if the Use Optimized Media If Available option in the Playback menu is enabled – DaVinci Resolve will use the optimized files on the timeline.
At any time you can deselect Use Optimized Media If Available to test playback from source files directly. It is therefore very easy to switch from one to the other.
From the Media Pool, having previously taken care to display the Optimized Media column, it is possible to quickly see the clips having generated proxy files.
There you have it, the workflow for using proxies with DaVinci Resolve 16 is ultimately very simple and works very well. This allows me to edit 4K files at 50 fps from my Fujifilm X-T3 that my machine can’t even read normally. Give it a try and tell me if it works for you and if you will integrate it into your projects.